

最近上交、科大以及阿里的一些docker镜像,好像都因为不可控力导致无法访问。
所以,之前好多正常的一些镜像的打包都会报错:
比如:
#1 [internall load build definition from Dockerfile#1transferring dockerfile:972B done#1 DONE O.1S
#2[internall load .dockerignore transferring context:112B done#2 DONE O.1S
#3 「internal] load metadata for docker.io/library/python:3.9#3 ERROR: failed to copy: httpReadseeker: failed open: failed to dorequest:
[internal] load metadata for docker.io/library/python:3.9:
Dockerfile:1
FROM python:3.92 > RUN apt-get update
RUN apt-get upgrade -y-.....
Exceeded: python:3.9: failed to copy: http Readseeker: failed open: faiERROR: failed to solve: DeadlineExceeded: DeadlineExceeded: DeadlinLed to do request: Get "https://production.cloudflare.docker.com/
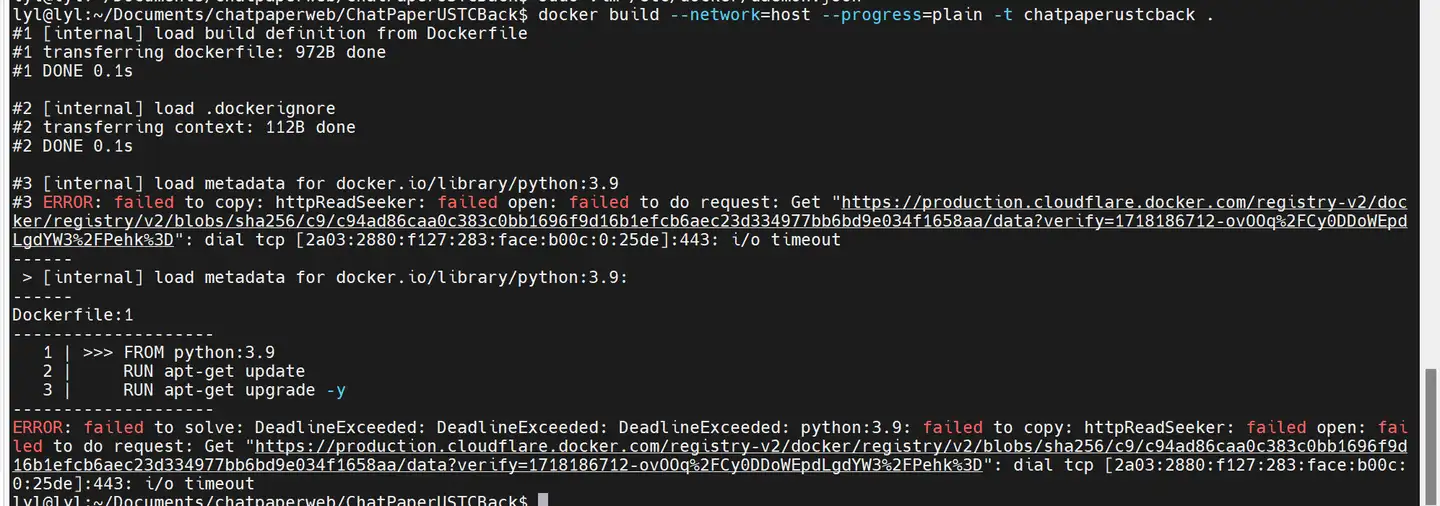
原先跑的好好的程序,突然遇到这种报错,基本上就是遭灾了。
遇到这种情况,需要有2个复杂的代理设置。更加不幸的是,我被Claude耽误了3个小时!
后面在群友的帮助下,以及官网文档的指导下,我给大家总结好了靠谱的教程(假设你的电脑本身就可以正常上网,具体的不要在评论区和私信讨论,默认大家都会~):
不知道这个帖子能不能发出去,希望能对大家有帮助。
1. 设置/etc/docker/daemon.json
这个直接用vim打开,或者vscode打开都行,我以vim为例子:
sudo vim /etc/docker/daemon.json
然后在原来的daemon.json文档中添加对应的代理地址,最终的效果如下:
{
    "proxies": {
        "http-proxy": "http://127.0.0.1:7890",
        "https-proxy": "http://127.0.0.1:7890",
        "no-proxy": "localhost,127.0.0.0/8"
    }
}
注意,这里需要确保冒号,逗号,符合字典的格式,稍微有一点格式错误,都无法重启docker。
另外,这个no-proxy可以不加。
2. 设置~/.docker/config.json 文件
先用vim编辑config:
sudo vim ~/.docker/config.json
然后填入:
{
    "auths": {
        "registry.cn-hongkong.aliyuncs.com": {
            "auth": "xxxxxx="
        }
    },
    "proxies": {
        "default": {
            "httpProxy": "http://127.0.0.1:7890",
            "httpsProxy": "http://127.0.0.1:7890",
            "noProxy": "127.0.0.0/8"
        }
    }
}
然后把对应的json文件改成上面的格式就好了,一般来说都会有一个默认的阿里云的账户,没有也没关系,删掉对应的内容即可。
2.重新启动 Docker daemon:
sudo systemctl restart docker
如果报错:
Job for docker.service failed because the control process exited with error code See "systemctl status docker.service"lyl lyl:~$and "journalctl -xe" for details.
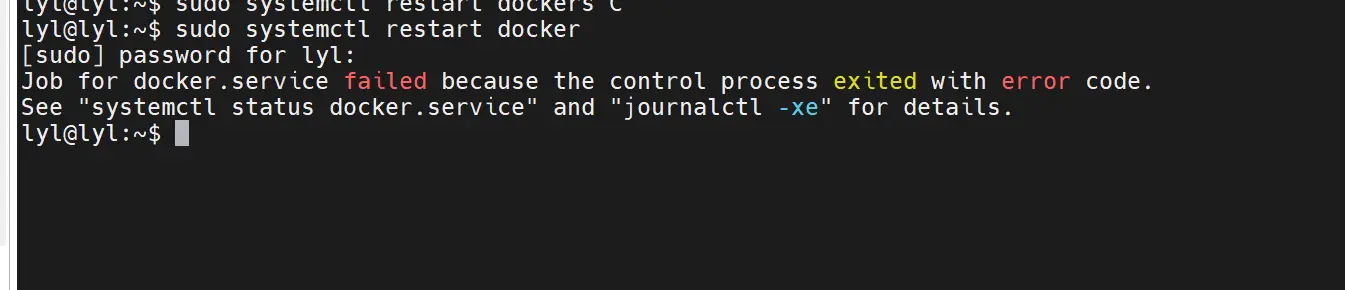
基本上就是你的daomon.json没配置好。
4. 检查结果:
如果能正常build image,基本上就OK了。
这里build的参考命令如下:
docker build --network=host -t image_name:lastest .
注意,这里的network需要设置为host!
如果帖子能发出去,感谢大家的三联支持~